External Camera Screen Overview
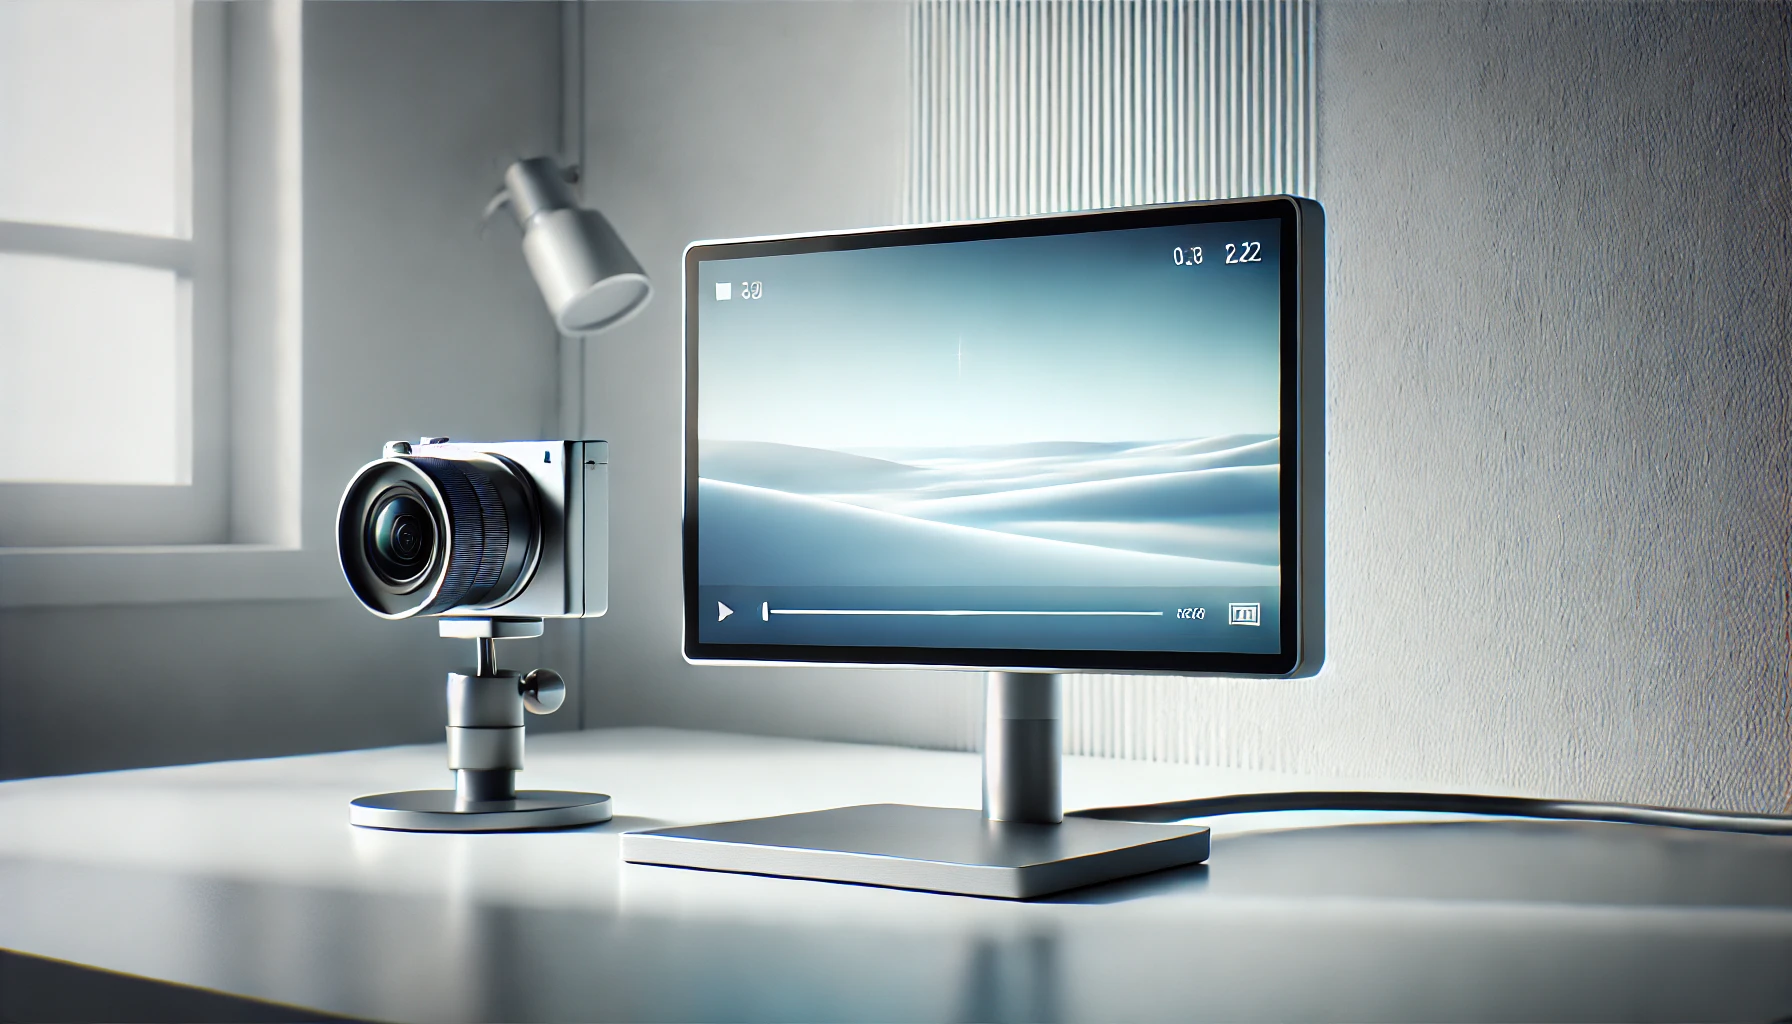
External camera screen also known as external on-camera monitor is a must to have add-on gadget to make your filming skill more sharp and to give your shooting creativity a bit more professional look.
Whether you are using an action camera or a bulky still camera, this add-on adds value to your task.
These monitors are used to attach externally to a digital camera using HDMI or SDI connections to aid with photography and cinematography.
Camera monitors typically have larger displays than the built-in monitors on consumer cameras, and are also usually brighter and able to reproduce color better.
But what’s the need of this external camera screens?
To have detailed view of what is being filmed currently, you need a small screen mounted on the cameras to check your work. Almost all modern DSLR and mirrorless cameras come equipped with a screen to view content.
But the problem is, they are small enough to give you detailed focus on your current work. Also you can’t completely rely on it. Some of the times when you see you filming videos on it, it looks great. But when you finally process you video on computer it looks “Ah! this is not that one”.
And there feels the need of adding an external screen to the camera. It not just provide a larger viewing area but can also offer additional tools for filmmakers not found on the cameras.
Here in this post we will give you a detailed analysis of why and how to choose an external camera screen and will provide you some of the best budget external camera monitors.
What’s the need of external camera screen?
Although these external screen on your camera increases the overall weight of your filming setup and the budget too, but it is really a useful addons that let you do your filming tasks more professionally.
You should buy a camera monitor for external recording or for enhanced visual tools to be able to nail focus and exposure more accurately.
So if you find yourself struggling to nail focus or exposure correctly in camera or need to record externally, then getting an external monitor might be a good option for you.
With the external monitor, you get a detailed view of what is being filmed and how things are looking in it how it will look on final finishing or at viewer ends. You can adjust the camera, it’s angle and position accordingly.
External Camera Screens and Monitors
Big external camera screens give you the exact detail of the brightness, and color accuracy level of the objects and the surrounding on the basis of which you can conclude how the video will look after final finishing. This lacks in the in-built screen.
Things look different on screen at different period of time according to the amount of light intensity present. You can check on external screen how all the stuffs are looking and can change the various modes and setting of the cameras accordingly.
Note :- We are going to take reference of only those brands which are common name for making external on-camera screens and I am quite familiar with them. These brands are -: ATOMOS, SMALL-HD, ANDYCINE, and DESVIEW
What to consider while buying external camera screen?
While buying your external on-camera monitor for your camera setup, whether budget one or the expensive one, you must consider following things:
Price
The price of external camera screens can vary anywhere from a hundred to 2K dollars depending upon the features it has or the name of the brand. In generally speaking, the more you pay, the more you get.
Some camera monitor brand that rules the market are Small-HD, Atomos, Andycine, Desview etc.
If you have little tight budget, you can go with the DESVIEW, ANDYCINE, SMALL-HD(5″) and if you can invest little more you will get little better like ATOMOS(5″,7″), SMALL-HD(7″). Even the budget one are better and support filming tasks with quality.
| BRANDS | PRICES |
| ATOMOS NINJA V 5″ | $650 (may vary) |
| SMALL-HD FOCUS 5″ | $300 (may vary) |
| ANDYCINE A6 PLUS 5.5″ | $160 (may vary) |
| DESVIEW MAVO P5 5″ | $130 (may vary) |
| ATOMOS NINJA INFERNO 7″ | $800 (may vary) |
| SMALL-HD FOCUS 7″ | $700 (may vary) |
| ANDYCINE X7 ULTRA BRIGHT 7″ | $330 (may vary) |
| DESVIEW R7 7″ | $200 (may vary) |
Size and Weight
Size matters. All of you might have heard this line. More the size of your monitor is, more focused your you can do your filming jobs. But in return the size will increase its weight and price too.
Most external camera screens come with two sizes, a 5-inches and a 7-inches. The extra two inches really makes a pretty difference in filming for getting a detailed view. So if your budget allow, go with a 7-inches camera screens.
But the disadvantage of the 7-inches monitor is that it is comparatively heaver and bulkier that has impact on the ease of your movement and on the gimbal stand. Also it is bit costlier for just 2-inches.
| BRANDS | Weight |
| ATOMOS NINJA V 5″ | 11.3oz |
| SMALL-HD FOCUS 5″ | 6.1oz |
| ANDYCINE A6 PLUS 5.5″ | 8.3oz |
| DESVIEW MAVO P5 5″ | 5.8oz |
| ATOMOS NINJA INFERNO 7″ | 22.4oz |
| SMALL-HD FOCUS 7″ | 13.6oz |
| ANDYCINE X7 ULTRA BRIGHT 7″ | 15.7oz |
| DESVIEW R7 7″ | 13.4oz |
Screen Resolution
Majority of these on-camera monitors come with 1080p resolution except some like Small-HD 5″ which has the resolution of 720p. As you are buying these monitors for accurately and focused filming, you should go with the 1080p.
Avoid 4k resolution screens as it not just increase your budget but also it is not too useful in a sense as you cannot distinguish between 4k and 1080p resolution in a small screen of just 5 or 7 inches.
| BRANDS | Resolutions |
| ATOMOS NINJA V 5″ | 1080p |
| SMALL-HD FOCUS 5″ | 720p |
| ANDYCINE A6 PLUS 5.5″ | 1080p |
| DESVIEW MAVO P5 5″ | 1080p |
| ATOMOS NINJA INFERNO 7″ | 1080p |
| SMALL-HD FOCUS 7″ | 1080p |
| ANDYCINE X7 ULTRA BRIGHT 7″ | 1080p |
| DESVIEW R7 7″ | 1080p |
Brightness
Monitors brightness are measured in nits. The more nits it is, the more bright your screen is. The brightness plays an important role while filming in sunlight.
You can’t see properly on a direct sunlight on your screen if it is low in brightness. Among all other ANDYCINE X7 ULTRA BRIGHT has higher nits of brightness.
The minimum level of brightness that can do your job is 300nits but you should go for at least 500nits of brightness if you are looking for outdoor filming setup. Above 2,000nits just give you next level crystal clear view.
You can take the reference of iphone 11, which has 811nits of full brightness.
| BRANDS | BRIGHTNESS |
| ATOMOS NINJA V 5″ | 1,000 nits |
| SMALL-HD FOCUS 5″ | 800 nits |
| ANDYCINE A6 PLUS 5.5″ | 500 nits |
| DESVIEW MAVO P5 5″ | 450 nits |
| ATOMOS NINJA INFERNO 7″ | 1,500 nits |
| SMALL-HD FOCUS 7″ | 1,000 nits |
| ANDYCINE X7 ULTRA BRIGHT 7″ | 2,200 nits |
| DESVIEW R7 7″ | 1,000 nits |
External Recording
External camera screen are not just bought to keep focus track on what is being filmed but sometime also to record externally through these monitors.
Sometimes you feel need to record externally when you don’t want to record certain part of your video in your main memory card.
Also if your camera has 30-minutes recording limit, an external recorder will light record as long as its battery and SD card lasts. Out of all other brands we are talking about only ATOMOS has the capability of recording externally.
| BRANDS | External Recording |
| ATOMOS NINJA V 5″ | Yes |
| SMALL-HD FOCUS 5″ | No |
| ANDYCINE A6 PLUS 5.5″ | No |
| DESVIEW MAVO P5 5″ | No |
| ATOMOS NINJA INFERNO 7″ | Yes |
| SMALL-HD FOCUS 7″ | No |
| ANDYCINE X7 ULTRA BRIGHT 7″ | No |
| DESVIEW R7 7″ | No |
Battery Life
All these monitors need external battery power source to run and not consume main camera power source. A monitor with average battery life can do your job without mess if you are mostly focusing indoor shooting. But for long outdoor filming stuffs, you must choose an on-camera monitor with better battery life.
| BRANDS | BATTERY LIFE |
| ATOMOS NINJA V 5″ | about 4 hrs |
| SMALL-HD FOCUS 5″ | about 14 hrs |
| ANDYCINE A6 PLUS 5.5″ | about 10 hrs |
| DESVIEW MAVO P5 5″ | about 7 hrs |
| ATOMOS NINJA INFERNO 7″ | about 7 hrs |
| SMALL-HD FOCUS 7″ | about 8 hrs |
| ANDYCINE X7 ULTRA BRIGHT 7″ | about 3 hrs |
| DESVIEW R7 7″ | about 5 hrs |
Tools and Features
Tools and features are one of the main reason why you have shifted to external screens. The powerful assistant tools that come with these monitors are really very useful for filming tasks which lacks in the in-built screen on the cameras.
These tools and features includes focus peaking zebras, false color waveforms, RGB parades, 3D LUT previews, audio meters, horizon indicators etc.
The RGB Parade scope displays waveforms representing the levels of the red, green, and blue channels in a clip. The 3D lookup tables (3D LUTs) are used to map one color space to another.
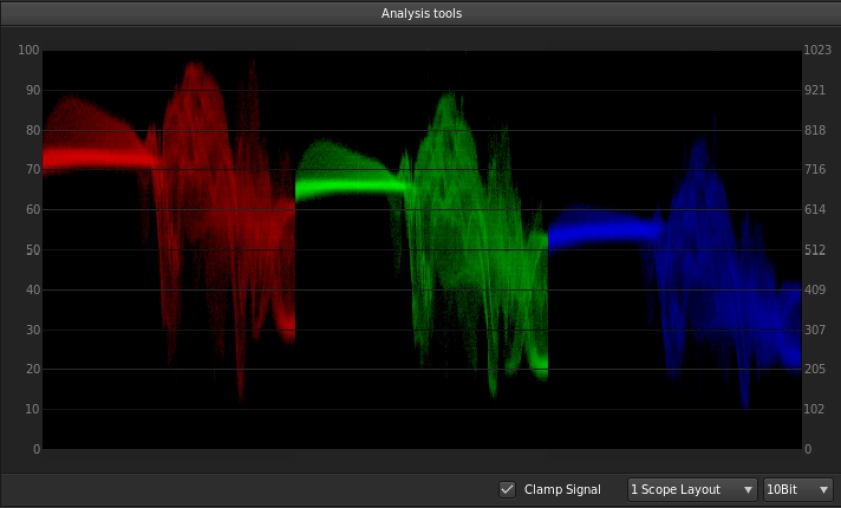
They are commonly used to calculate preview colors for a monitor or digital projector of how an image will be reproduced on another display device, typically the final digitally projected image or release print of a movie.
Out of all the other external monitors, ATOMOS and Small-HD are packed with more features giving you more advantages of pro tools for your filming tasks with quality.
Touchscreens
Having a touchscreen on your external monitor is a big deal which allows you to navigate on the screen more easily. Majority of these monitors come with touchscreens with almost same touch sensitivity.
| BRANDS | Touch |
| ATOMOS NINJA V 5″ | Yes |
| SMALL-HD FOCUS 5″ | Yes |
| ANDYCINE A6 PLUS 5.5″ | Yes |
| DESVIEW MAVO P5 5″ | No |
| ATOMOS NINJA INFERNO 7″ | Yes |
| SMALL-HD FOCUS 7″ | Yes |
| ANDYCINE X7 ULTRA BRIGHT 7″ | No |
| DESVIEW R7 7″ | Yes |
After getting all the aspects of these brands, then what for you. Definitely which fits better for you depends on your needs, whether you are seeking it for indoor or outdoor shoot, whether for average amateur or high quality professional work bla! bla!.
If you are little tight in budget, you definitely want affordable one with all the essential features but if money is not your problem you can go with the expensive one.
In order not to confuse you, we are not going to give you a long list of monitors. There are two lists, one for budget and another for expensive external screen monitors.
Best budget external camera screens (on-camera monitor)
Here is the list of best external camera screen under budget but best in their performances to professionalize your work. Please note, the order in the list doesn’t represent the rank of the the external monitors.
1. Atomos Ninja V
Features :
- 5-Inches
- Touch Screen
- 1920×1080 resolution 60p
- HDR Daylight Viewable
- 1000nit brightness
- With recorder
- 12.7 ounces weight
- 5.94 x 1.22 x 3.6 inches dimension
Atomos is a popular company for making camera’s screens. This is one of the popular option for external monitor for those who want to record externally too with touch features and good brightness.
The sleek aluminium body is crafted for maximum durability without affecting its overall weight.
2. SmallHD Indie 7
Features :
- 7-Inches
- 1920 x 1200 resolution
- Touch screen
- 1000nits brightness Daylight Viewable
- 10-Bit, IPS LCD Panel
- Supports Video Input up to UHD 4K30
- 31.2 ounces weight
- 4.2 x 7.09 x 1.32 inches dimension
SmallHD Indie 7 external screen is for those who want a touch screen monitor with good battery life and brightness. Its IPS LCD display is better for daylight viewable.
For the Content Creator, Indie 7 provides creative professionals with access to the smartest monitoring toolset in the industry. With a hyper-responsive touchscreen, milled aluminum chassis and 3G-SDI and HDMI inputs and outputs.
3. ANDYCINE X7 Ultra-Bright
Features :
- 7-Inches
- 1920X1200 resolution
- 2200 nits ultra-bright
- Daylight Viewable
- 4K HDMI Input and Output
- 17.6 ounces weight
- 9.1 x 6.7 x 3.7 inches dimension
- Aluminum body
Andycine X7 ultra-bright is a nice option for those who want maximum brightness to shoot in the the day sunlight giving you 4k HDMI input output features.
X7S has 3G-SDI, 4K HDMI in and loop-out, allow it to not only display live signals, but also send them out to other monitors simultaneously.
4. DESVIEW R7
Features :
- 7-Inches
- 1920X1200 resolution
- Touch screen
- 1000nits brightness
- 4K HDMI in/Output
- More features and tools
- Support 180° vertical rotation
- 32.16 ounces weight
- 7.01 x 4.61 x 8.74 inches dimension
Desview R7 external screen is for those who want lots of features at affordable price. Brightness is good and supports 4K HDMI with touch screen.
The False Color filter is used to aid in the setting of camera exposure. As the camera Iris is adjusted, elements of the image will change color based on the luminance or brightness values. This enables proper exposure to be achieved without the use of costly, complicated external test equipment.
5. FEELWORLD LUT7
Features :
- 7-Inches
- Ultra Bright 2200nit
- 1920×1200 resolution
- Touch Screen
- 3D Lut Waveform Vectorscope
- Automatic Light Sensor
- Assist 4K HDMI Input
- 360°rotation
- 32 ounces weight
Packed with lots of features like advanced features like Parade, VectorScope, RGB Histogram, Peaking Focus Assist, False Colors, Zebra Exposure (1%~100% adjustable), Scan Mode (Under Scan, Over Scan), Zoom (100%~300%), Anamorphic Mode at very affordable price, this is really helpful for creative minds without having much affect on their pockets.
6. Lilliput Q7
Features :-
- 7-Inches
- Resolution of 1920×1200
- Good Color Accuracy
- Viewing angle: 170°/170°
- Thin Metal Body
- Folding Sunshade Cover
- 30 ounces weight
This is a thin metal bodied unique looking camera monitor packed with lost of features like Integrate the column (YRGB peak), time code, waveform and vector scope & audio level meter, which make in stand side by side to others in DSLR kit world.
Even though the body is of metal, the whole weight is surprisingly less of just 30 ounces. The bad part of this screen is that it is of comparatively low brightness. The brghtness of Brightness: 500cd/m² (500nits) is fairly good but not enough to shoot at bright sunlight.
Best expensive external camera screen (on-camera monitor)
Here is list of few expensive external camera screens but there ad-on features really worth the amount of money. These on-camera monitors are used by big professionals and mega budget video makers.
1. SmallHD 703 Ultrabright
Features :
- 7-inches
- Full-HD LCD display
- 1920 x 1080 resolution
- 2200nits brightness
- HDR Preview
- 3D Lut Support
- Professional Software Tools
- Gorilla glass cover
- 2 x SDI inputs and 1 x SDI output, 1 x HDMI Input and 1 x HDMI output
- 26.4 ounces weight
- 1.13 x 8.38 x 4.88 inches dimension
This is expensive monitor but if you can afford it, it really adds value to your money. Equipped with all the necessary features and tools, this makes your work more professional. It has best brightness, it has good resolution and break proof glass to shoot action with action.
The size of this external camera screen is just like the budget one but the working quality is quite considerable for a professional filming.
2. Atomos Sumo : Professional external camera screen
Features :
- 19-Inches
- 10-bit HDR High Bright Monitor
- 1920×1200 resolution
- 16:9 native aspect ratio
- Accepts up to 4Kp60 or HDp240 over HDMI or the dual 12/6/3G-SDI inputs
- Realtime Exposure on set from Log for HDR & SDR
- Load an infinite number of custom LUT’s onto SUMO19M via the HDD/SSD slot
- For Professionals
- 191 ounces weight
- 19.84 x 2.48 x 12.2 inches dimension
This is huge, a 19 inches mega screen for professional film makers packed with all the pro features to make your task more quality. Since it has everything from size to lots of features, this external camera screen is used by film and documentary makers.
If you are planning to buy this, keep assure that you are buying it for daily commercial use. Buying it for amateur purposes will loose your pocket too much.
3. SmallHD 702 Touch
Features :
- 7-Inches
- Touchscreen
- UXGA Wide, HD, FHD 1080p 1920 x 1200 Resolution
- IPS-Type LCD Panel Type
- Cine 7 UltraClear Screen Protector
- 8GB SD Card
- HDMI Hardware Interface
- 31.2 ounces weight
- 7 x 2 x 9 inches
Again a SmallHD brand in the list. This external screen is not just expensive but one of the widely used by those content creators who can afford it. Packed with all the features from touch IPS screen to screen protector, this deserves to be considered while buying an external camera screen.
External Camera Screen FAQs
What is external screen?
External screen is an add-on accessory that can be mounted on your camera, might be on your DSLR or on your mirrorless camera to give you a detail focus on what is being filmed currently, as inbuilt screen on these cameras are too small to nail focus properly.
These external screens are big or more bigger and definitely adds the weight on your setup, but the the functionality it offers worth all these.
What is the purpose of a camera monitor?
Well, you can still do your job with in-built screen on the camera body, but the size of these screens are too small. To have a detailed nail focus on your filming, you would need some bigger external screen attach with your camera.
Not just this, external on-camera monitors are also used to record externally and have some useful tools that lack in the camera.
Can I use my phone as a monitor for camera?
Yes of-course. All you need to do is to attach the camera with the mobile using USB cable and OTG adaptor. There are lots of app that will help you do this in a proper way. There are lots of nice smartphones for 4k shooting and video editing in the market.
Follow the instruction to connect your phone or tablet with the camera monitor –
- Connect your USB cable to your camera’s port.
- Attach the OTG adapter to the other end and hook up your phone/tablet.
- Switch on your camera and set it to Live View mode.
- Open your app of choice on your phone.
Can you attach a screen to a camera?
Yes, and this post is all about. Not just external screen, but you can attach various other accessories like external microphone, external flash, extra battery power etc. to make your your filming tasks more productive.
How do I use an external monitor as a Webcam?
Its easy all you nedd to do is to connect the USB cable to the monitors USB Type B port on the back of the monitor and attach the other end of the cable to an available USB port on the computer. Allow 10-15 seconds for the computer to recognize the external webcam.
Which external screen should you use 4k or non- 4k?
As i already mentioned in resolution section that 4k external camera screen is not so much useful as you are using it just for checking your tasks and not for enjoying. You even can’t differentiate between 4k and non-4k in just 7-inches screen. Also it will increase your budget as 4k monitor costs higher.
Does adding external screen increase too much weight on the setup?
Definitely, it adds overall weight of the filming setup by mounting an external monitor on the camera. But the weight it adds is overweighted by the features it adds for the accuracy and comfort of shooting. The average weight of an external monitor is not more than 10oz, which is not enough not to be handeled.
Some other camera accessories to have in your kit
Lens cleaning kit
This is the first thing you should buy after you pick up a camera. If I see you breathing on your camera lens and then wiping it with your shirt, I will take your DSLR and hurl it into the ocean. This is not a joke.
Be sure to buy a lens cleaning kit that includes an air blower, cleaning pen and a micro-fibre cleaning cloth, and you’ll be able to take care of your camera properly.
Spare memory cards and extra batteries
If you didn’t already get one when you bought your camera, a memory card is the second thing you should buy after a cleaning kit.
I wouldn’t even call these an accessory – they’re an essential component because it’s not like your camera has a built-in memory to store all of your happy snaps.
It’s also handy to have a few extra memory cards, so you can easily swap out a full one for an empty one. It’ll save you having to do an on-the-spot purge of older photos.
It can’t hurt to have an extra camera battery either. If your camera runs out of juice, you can easily chuck a fresh one in and keep shooting. It’s better to have some extras and not need them. Just make sure you’ve bought a camera battery that’s compatible with your DSLR.
External flash
When shooting in a low light space, an external flash will give you lighting that your camera’s built-in flash just can’t deliver. The difference in quality between the two types of flashes is night and day.
A hot-shoe flash will slide comfortably onto the top of your camera, while a wireless flash can be triggered remotely (there’s a good chance you can grab a flash that has both).
Grabbing multiple wireless flashes isn’t a bad idea either, as it’ll give you more versatility when setting up your lighting. You can keep one on your camera, while you can attach the other to a soft-box.
Lens hoods and filters
Plagued by lots of glare while shooting during the daytime? Just whack on a hood and your lens will get some much needed shade, which will help to cut down on any lens flaring and stray light. Just make sure the hood is the right fit, first.
Lens filters offer similar exposure assistance when it comes to controlling light levels. A UV filter will help reduce the amount of UV rays, while a neutral density filter will help you better reduce the amount of light entering your camera. Just make sure you’re grabbing the right-sized filter for your lens.
Filters can also offer an extra layer of protection, as it’ll stop your lens from getting dirty or scratched.
Tripod
If you’re going to be using your camera for filming, or plan on taking a lot of long exposure photos, a tripod is absolutely essential.
If you don’t think you need a tripod, you should still pick one up. It’s a handy tool and you never know when you’ll need to lock your camera down to shoot.
You can buy a decent tripod for fairly cheap these days – the centre pillar of this Neewer aluminum tripod can be removed to transform it into a monopod, giving you an extra shooting option.
There are some more heavy duty tripods out there, but those usually come with a higher price tag. Regardless, just make sure the tripod is lightweight.

